Prepping, homesteading and living the simple, green, independent life.
Showing posts with label homesteading. Show all posts

Sunday, June 5, 2011

Mason Jars: Great Invention or Greatest Invention?

0.
I'm seriously falling in love with mason jars.  They're just so useful!

It seems like every week I think of new ways to use them.  I'd even use them to drink out of but my wife would kill me.

One thing that's been bothering me for a while are the amount of ziploc-type bags we go through.  I mean, it seems kinda wasteful doesn't it?  I know some people who wash these bags and re-use them but my wife again isn't too keen on that either.

 Plus the thought of plastics degrading overtime in contact with food...I know, I'm probably just paranoid.

So a few weeks back I'm at the grocery store and I decided to buy some of those mini-hamburger patties (sometimes called "sliders") that my girls love.  I did them on the BBQ and after we ate there were a bunch of them leftover.

Since all our containers weren't cleaned yet I was about to use a ziploc bag when I thought, "I bet those mini-burgers will fit well in mason jars...".  And they did!


Then I decided that since they were in the jars, I might as well vacuum seal those suckers, freeze them, and then they'll last a long time (the vacuum sealer instructions says up to a year if you trust that).

So that's what I did.  I also froze the little buns too so now I can pull out a few burgers for them for a quick meal for my girls.

I also rehydrate a little bit of dehydrated onions for them which they love.  The dehydrated onions turn out like those little onion pieces that McDonalds puts on their burgers; the dehydration increases the sweetness.

This got me thinking of what else I could put in mason jars and freeze but so far the only other thing I've done is ground beef.

I try to buy the bulk packs of ground beef and split it up into smaller portions in ziploc bags.  Sometimes I'll cook it up before freezing it for quick meals later but thawing the beef in the microwave while in the ziploc was always kinda gross.

So what I'm doing now is cooking the beef when I get home (throw in some dehydrated onions for flavour) and portion it out into mason jars that are then vacuum sealed.

This makes it super-easy to make pate chinois (French-Canadian style sheppard's pie).

All I do is microwave the ground beef in the mason jar, boil some dehydrated corn, and make some mashed potatoes, which is the hardest part.  I could use dehydrated potato flakes but it's not as good.  Maybe someday I'll have discovered the secret to making your own dehydrated mashed potatoes.

We've also started going to a Bulk Barn that opened up in my home town and instead of leaving everything lying around in the plastic baggies the store supplies, I've been putting the stuff in mason jars and vacuum sealing them if we're not going to use them right away.

With all these uses I'm finding for mason jars I think I'm going to buy one of the dedicated mason jar vacuum sealer attachments.  The canister work-around is great but the largest mason jars, which I didn't think I'd use often, wont fit inside.


I think I'm also going to pick up some of those plastic lids for the jars instead of just using the metal ring and lid.  Once the vacuum seal is broke, what's the point of fooling around with the ring and lid right?  Might as well keep them in good condition to be re-used.  I need to conserve my supplies 'cause once you get started with mason jars you can't stop! At least that seems to be the my case.

Sunday, February 6, 2011

This Topic Sucks

I finally got around to using the Foodsaver vacuum seal system that I got for Christmas and I love it!

I've been trying to dehydrated a lot of food and so far I've been storing it in mason jars with oxygen absorber packs. These O2 absorbers do the trick but they lose their efficiency the longer they have contact with air. This makes it tricky to store them. If you don't seal them up airtight, when you go to use them again they won't work anymore.

A vacuum sealer though can take the place of these O2 absorbers and you'll never have to worry about them going stale or running out. The O2 packs aren't expensive to buy, I paid about 30 bucks for 100, but its nice to never have to buy them again.

I'm sure most people are familiar with these type of vacuum sealers. Typically they seal food in plastic bags by sucking the air out and melting the end of the bags so air can't get back in. The company claims frozen vacuum sealed steak will last up to two years without freezer burn!

The model I have comes with an accessory hose which is where things really get fancy. There's all kinds of accessories; wine bottle toppers, meat marinaders, leftover containers, even a mason jar sealer.

What I have however are the vacuum canisters that come in 3 sizes.

The canisters are meant to actually hold food but somebody on The Survival Podcast forum had recommended these over the mason jar attachment because you can vacuum seal almost any jar inside them.

Basically you just loosely place the lid on the mason jar, put it in the canister, hook it up to the tube and turn the machine on.

The machine is rather loud but as air in the canister decreases it gets quieter for about 10 second, when it shuts off. This means the air is gone.

The vacuum in the canister removes the air from the mason jar and seals the lid tight. You can double check the seals by pressing the lids to see if they "pop". No pop means no air.

I've also read people claiming that this method will seal foods like pickles and jam in the original factory jar but I haven't tried this yet.

I really like it so far and recommend a Foodsaver to anybody who's looking to store food. The only problem I have now is that I've run out of mason jars!

Wednesday, November 10, 2010

Raking Leaves is for Suckers!

I hate raking leaves.  In fact, I usually don't rake them at all or do the minimum necessary to make the yard look half-decent.

We have two large maples which dump a lot of leaves on our small 20 x 30 back yard so I felt very smart when it occurred to me that I could just use the lawnmower to turn the leaves into mulch.  No more raking ever again!  I felt very smart to have figured that out all by myself but that didn't last because I quickly realized that a lot of people do this.

The weather was nice today so my wife and I decided to get the yard ready for winter and I broke out the lawnmower for my anti-raking experiment.  I set the blades a little higher than normal because I didn't want to harm the grass.  Result: I'm pretty impressed!

As you can see in the pictures the mower really did a good job of breaking down the leaves.  Where you'd see nothing but leaves at first you'd see mostly green after the mower went over them.

It also occurred to me that when making compost the guides always say to include a good mix of greens (nitrogen) and browns (carbon).  It just happens that a good source of greens and browns are grass clippings and dry leaves respectively.  By mulching these leaves they'll have the winter and spring to break down and turn into natural compost.  I guess there's a reason mother nature doesn't rake the leaves eh?

Saturday, October 30, 2010

Food Dehydrating Fun!

A few weeks ago I received my Excalibur dehydrator in the mail. I bought a refurbished model with a 10 year warranty for $160 at the companies website (they're regularly over $200) but shipping was another $56 and duty was $27. I'd recommend looking into the Canadian supplier, Basic Life Essentials, to lower shipping and avoid duty taxes. You can also order them from Amazon.

There are less expensive dehydrator brands out there but if you want to seriously get into dehydrating as a way of preserving and storing food I'd go for an Excalibur. I used to have one of the smaller less expensive models. They're good for trying out dehydrating and making a few snacks but f you want to dehydrate a bushel of apples that you pick up on sale at a farmers market or do a whole 10 pound bag of potatoes you'll need the Excalibur. The other models aren't large enough and it would literally take a week to dry all those apples or potatoes. For this reason I'd also recommend getting the 9 tray Excalibur instead I'd the 4 tray model if you can afford it.

I've been trying out tons of different foods in the dehydrator and so far I'm pretty impressed. You can eat the foods dry themselves or rehydrate them to use in meals. When you dehydrate the food the texture is never the same as fresh but that's okay if your using them in stews, soups etc.. To rehydrated them I boil the dried food for a few minutes. You can also steam your veggies to rehydrate them.


(Above: dried tomato, red /green peppers, celery, mushrooms, broccoli, potatoes and my assistant)

The dried peppers in my homemade salsa are pretty good. The potatoes are excellent pan fried or in a stew but they're too thick and slimy mashed. Rehydrated apples in an apple crisp are also really good.  Tomatoes come out soft but are good for soups.  As for broccoli, the stems get too tough so just dehydrate the tops. I haven't done onions or garlic yet because supposedly they really stink up the house and it's too cold to open the windows to ventilate.

My general idea is to buy veggies on sale and dehydrate them so they'll last a long time. I got a bunch of mason jars for my birthday and bought oxygen absorbers from that Canadian supplier I mentioned above. If I put the dried food in the jars with the O2 absorber it should last at least a year though various sources claim they'll last up to 5 even 30 years! Personally 5 years seems the limit to me and after 2 years I'd be wary.

The website Dehydrate 2 Store is a great resource with tons of recipies, tips and how-too videos.  The book "The Dehydrator Bible" also has a lot of great tips and recipes which is where I found my recipe for apple crisp.

I'm learning that there are a lot of different methods and recommendations out there so if you want to get into dehydrating try different things and have fun experimenting!

Friday, October 8, 2010

Our Water Bill VS Our New Washing Machine

Exciting times!  Our food dehydrator AND the latest water bill arrived yesterday!

After I've tested out the dehydrator more I'll blog about it but for now a quick post about the effect our new high efficiency washing machine has had on our water bill.

Our previous water bill showed that we used 46 cubic meters of water during the first 4 month billing period of January to April.

This latest bill showed that we only used 29 cubic meters!

I suck at math so correct me if I'm wrong but:
46 cm - 29 cm = 17 cm
17 cm / 47 = 36%

So that means we've used 36% less water!

If you've been reading this blog you may remember that our first water bill showed 79 cubic meters used!  I estimated though that our average was around 58 c.m. since our newborn baby probably bumped up our usage in the first billing period.

So this means that since earlier this year, we've dropped our water use from 58 c.m. to 29!  That's a 50% reduction!  Hopefully this trend will hold.

As I said before, I'm very impressed with our new LG high efficiency washer and dryer and would recommend them to anybody.

With the money we're saving from using less water and electricity while doing our laundry these machines are going to pay for themselves in a year or two!

Wednesday, September 1, 2010

You Know You're Getting Old When...

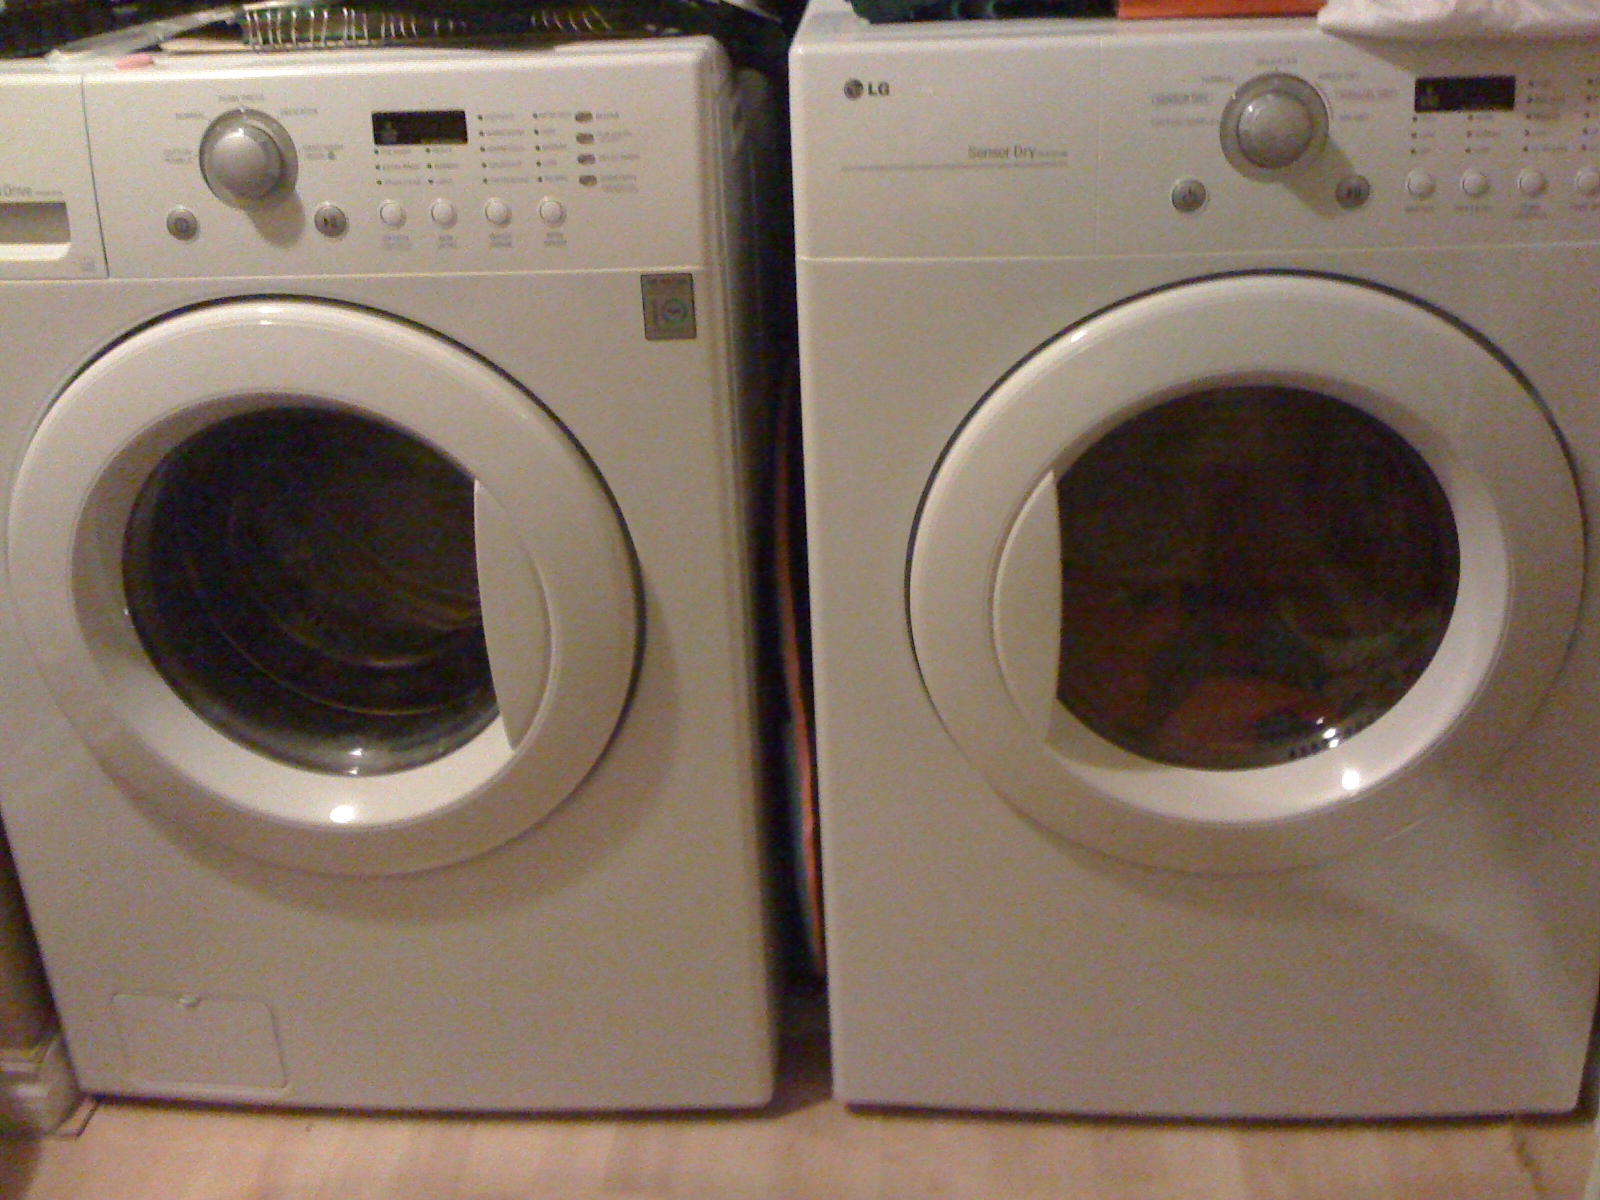
A few weeks back we received our new high-efficiency front loading LG washer and dryer set and I have to say, I'm pretty impressed by them.
 
The set was only around $1000 (on sale) but I felt like I'd gone from a Chevette to a Cadillac when compared to our old set.  A cute little luxury feature is that they play a little song when a load is done.  I told my wife I've always dreamed of having a somebody who loved housework so much that it sang to her.
 
The washer is very efficient at conserving water.  In fact, at first we weren't sure if we hooked it up properly because we couldn't see any water through the glass door.  It turns out that the machine weighs how much clothes are in it and only uses enough water to soak the clothes. I'm very curious to see how this affects our next water bill because I estimate we've gone from using approx. 20 litres a load to maybe only 4 or 5.
 
Although these style of washer do take longer to clean a load (about an hour), we can do much larger loads so the time spent works out to about the same.
 
Another thing that's great about the washer is that it spin-dries the clothes so well that they come out of the washer just damp and almost dry.  Sometimes I have to think twice if a load has even gone through the washer since so much water is removed. 
 
As for the dryer, I'm a little disappointed that it was rated as only average when it comes to energy use, however we're noticing that most loads get dried in under 25 minutes. Not only does the washer do such a great time spin-drying, but the dryer also has a sensor that can tell when the clothes are dry and it will shut itself off.  Very often the timer will show 30 minutes or so left but then a couple minutes later it shuts off because the clothes are dry!
 
In a few years time, after we build our next house, I'd like to look into getting a similar style propane or natural gas dryer.  This would really reduce our energy use.  Sure we could use a clothesline to dry our clothes, we used to and probably will again some day, but with two little kids it's much easier to just use the dryer.
 
On the "luxury" side of things I'm impressed by how huge the interior of the dryer is and it's kinda neat to have a light inside it.
 
So far the only minor downside to these is that I find we have to remember to leave the washer door open to allow it to dry out.  The front loading door is water/air tight and I've noticed that if we forget to leave the door open it is still damp inside days later.  I'm afraid that this could lead to a musty smell and maybe mold which probably explains why the washer has a "self-cleaning" feature.
 
We're pretty happy with our new washer and dryer set but also a little depressed.  When you reach the stage that the most exciting thing in your life is your new washer and dryer you know you're getting old!

Thursday, June 17, 2010

Pioneer Solar: PV System For Free?

I received a flyer from Pioneer Solar in the mail the other day which claims to help people get a solar system installed on their house, farm, or business for free. Sounds too good to be true, right?

Well, like most things there's good and bad points about it and what might be a good deal for one person might not for another.

Here's how it works:

The Ontario government recently started a program where homes and businesses / farms that install solar or wind power will be paid a guaranteed rate per kilowatt for a 20 year contract.

What Pioneer Solar does is install the PV system for "free" but for the first 10 years, the money you're paid by the government for the electricity goes to Pioneer Solar.  You get to keep the revenue from the 10 years left in your contract with the government though.


The example in the flyer states:

Solar System Earnings / Month = $840
Solar Finance Payment               = $780
---------------------------------------------------
Initial Monthly Earnings            = $60
Eventual Monthly Earnings       = $800 (after 10 years)


They're promoting it as an investment that's better than stocks.  One way of looking at this is that you'll eventually be earning a monthly income with no initial investment.

However, using the figures from the flyer this means that you'll have paid over $93 000 for the PV system.

From all the research I've done I estimate that a PV system large enough to power a modern but energy efficient home, would cost between $25 000 and $35 000 to professionally install.  If you do it yourself it's could be half of that and you don't need Pioneer Solar to apply for a 20 year government energy contract.

Another downside is that all this energy produced goes to the grid and doesn't isn't actually used for your home. I assume however that once you own the solar system after 10 years, you can turn it into a hybrid system to power your house. It's possible however that the 20 year government contract may disallow this (I've written Pioneer Solar and email to clarify this).

Despite those downsides, you're still getting a PV system for "free" and making an income for at least 10 years from selling the energy.

For those who are looking to go off-grid and be a self-sustainable as possible, the prospect of waiting 10 to 20 years to use the electricity might not be worth it.  Though the income it would provide would go a lot towards becoming independent.

If you're looking to help the environment and make some money however it might be a great idea.

I know if I owned a property right now suitable for such a PV system, I'd be giving them a call.

Wednesday, May 12, 2010

Do It Yourself Home Improvement: Book Review

I love the books done by DK publishers; their books are always very informative and very visual with nice photos to help explain the topic.

This is why when I was at Costco the other week I had to pick up the book, "Do-It-Yourself Home Improvement: A Step-By-Step Guide".

My wife asked me why I needed another home improvement book but this one was different.

I've read other books in the past but often the authors assume that you have a basic knowledge or tools an terminology.  The DK book explains even the VERY basic; it even shows you how to use a screwdriver, ladder and saw!  Believe it or not a lot of people don't know the proper technique to use these basic tools which includes me!

The pictures are very helpful and explain things step by step.  I wish I had this book years ago; it could have saved me from making a lot of mistakes.

Unlike other books it also was a true Canadian version, instead of an American book with a 2 page addition for Canadians tacked on.

Another great thing is that the book includes many green and energy efficient topics for the home along with excellent photos.  I learned a lot from this book on things like rain catchment and grey water systems which until now I wasn't able to discover much about other than that they existed and were available.

I really recommend this book. It's great for not only the beginner who wants to do a few simple things around the home but also for those doing major renovations or building.
                                                                                    
                                                                                                                (Canadian version above with Link)

Tuesday, April 20, 2010

Welcome to the Waterpik Experience!

A few days back my wife mentioned that the showerhead was getting clogged again and that we'd need to soak it in vinegar again.

Our last waterbill is still on my mind so when she told me this I thought, "What a great excuse to get a new water-saving showerhead!".

The model that had gotten blocked was a water-saving model and I had recently read that older models were prone to blocking in areas with hard water.  Newer ones also have rubber outlets so if they ever scale up you just rub them with your finger and it unblocks them and they're supposedly more efficient.

We picked up the Waterpik Ecoflow from Canadian Tire (on sale this week for only $23.)

What I really like about this one is that it has a shut-off button so you can turn the shower off without closing the faucet and losing your temperature setting.  This allows you to get wet, shut off the water, lather up and then turn the water back on to rinse off.

The package claims you'll save up to 77% water by using the shut-off button.

When my wife brought it home she wanted me to install it right away, but feeling lazy I intended to only read the instruction so I'd at least look productive.

"Welcome to the Waterpik Experience", the instructions exclaimed before assuring me that installation can be done by hand in just a few minutes.

With my aversion to physical labour satisfied and a sudden urge to see first hand the "Waterpik experience (TM)", I decided to give it a try.

The original showerhead came off easy enough, though I did need a wrench to initially loosen it.  The next step was to just screw on the new showerhead and attach it to the hose.  Pretty simple I have to say.

I turned on the shower and there was a small leak in the two connections so I used a wrench to tighten them and scratched up the plastic couplings (Grr...).

After this it was still leaking so I went back to check the instructions and noticed that the rubber washers had fallen out of the hose.

I unscrewed the showerhead and installed the washers (scratching the plastic further).  I decided to just tighten them by hand this time to see if it lived up the claim of "no tools required".

I have to say I'm pretty impressed.  It was pretty easy to install and if you do it right you probably won't need tools.  If you avoid the mistakes I did the whole process can probably be done under 5 minutes.

According to our last water bill we're looking at close to $1000 a year for water charges.  With that expense my wife and I have been talking about getting a new high-efficiency washer which would probably pay for itself in a few years.

With a new shower head, dual-flush toilets and soon a new washer we're curious to see what our next waterbill will be like!

Sunday, April 11, 2010

My Quick and Easy Square Foot Garden

Here's my little garden that I did last week.  It's a modified square foot garden where instead of a 4 x 4 bed this is 1 x 28.

I have a small 50x 50 lot so there isn't room for anything much larger.

The walls of the bed are plastic fake stones.  They're $15 for 9 feet at Walmart and Canadian Tire.  I got 3 of them which I figure is cheaper than the wood I was planning to make it out of. I do plan on hammering wooden stakes in the outside ground to make them a little more stable.


They were super easy to set up too; took like 20 minutes.  I put cardboard on the bottom of the bed to get rid of the grass.  After the cardboard kills off the grass it will breakdown into the soil.


I tried to use "Mel's Mix" (the fellow who developed Square Foot Gardening) of  1/3 compost, 1/3 vermiculite and 1/3 peat moss though mine is a little heavy on the peat moss.


That's peat moss on the left, vermiculite in the middle, and compost on the right.  I put it all on the tarp because not only does it keep your lawn neat, but it makes it easier to mix.  All you do is lift up each side and corner and it all rolls on top of itself.  If the tarp isn't too heavy you can just pick it all up and dump it in your garden bed.


I then used sticks around the house to mark off the one foot squares.


Each square has a different plant/vegetable.  I rotated it by root veggie/leaf veggie/herb/flower/ fruit veggie.

As you may be able to see I've got downspouts and rain barrels on each end of the garden.  I plan on installing a drip hose on them to help water the garden later.

I think I'll also install planter boxes on my front and back porches to plant more veggies and my wife is excited about putting a dwarf cherry tree in the front yard.

This is my first attempt at gardening so hopefully everything works out all right. So far it looks good because one week later I've already got radishes sprouting!

Monday, March 29, 2010

Product Review: Hydroclean Water-Saving Toilet Fill Valve

The other week my wife surprised me with a gift that only a prepper could  get excited over: a dual-flush toilet retrofit!

I'm really excited to try out this gadget, however when I read the instructions I found out that it doesn't work with the "ball and lever" floater style fill valves.  I'd have to switch over my toilet first before installing it.

There are many different types of fill valves and company that makes the dual flush recommends their own which also has a water saving feature. I picked one up at Canadian Tire for around $17.

There is also a "deluxe" version for $19 that includes jets which supposedly clean the inside of your toilet tank with each flush.

Installing it was super-easy and just took around 10 minutes.  The only tool I required was a wrench to remove the old fittings, the rest is done by hand.

These things are supposed to save water through a little lever valve where you can adjust how much water goes down the refill tube and into the toilet bowl.

The instructions include a simple technique to determine the proper amount of bowl water, however I decided to try the "trial and error" method.  I placed the valve at half open and there is a noticeable difference in the amount of water in the bowl.  As far as I can tell this hasn't affected the flush and I estimate we're saving at least a liter each flush.

I'd recommend people try give this device a try, however, one thing to keep in mind is that it isn't meant to be used with those toilet pucks that you put in the back of the tanks.  The instructions don't explain why but I assume it's because the chemicals will breakdown the plastic parts.

Soon I'll get around to installing the dual-flush retrofit and I'll post the results.

Has anybody else tried these gadgets or a similar device?

Tuesday, March 23, 2010

More Tips My Wife Hates

People seemed to get a kick out of my post about tips that my wife hates so I thought I'd keep it.

I should let you know though that she doesn't hate all these things.  She seems to range from strong dislike to tolerance with a dash of "my husband is odd".  I should create a "Spousal Colour Scale":

Red: Strong Dislike

"There is no way we're doing this. I'm afraid Chidren's Aid will come for the kids."

Orange: Dislike

"Bad idea.  Rework it and maybe try again later after I've calmed down."

Yellow: Toleration

"I think you're odd but it's not worth the fight so don't push it."

Green: Acceptance

"I was skeptical at first but it was a good idea after all."


Push Lawnmower (Level Green)

I hate gasoline mowers.  Pulling that crank over and over, flooding the engine, the noise: not worth it. Plus I don't like paying for gasoline and the hassle of running out during the middle of a job and having to go get more.

That's why when we moved to our current house with a small lot I thought I'd try out a push mover and it works pretty well.

You get a bit of a workout pushing these things so I wouldn't recommend them for large lawns.  I'd also suggest not buying the cheapest model out there which is what I did and ever season I have to replace a bolt here and there.

These reel-style mowers are actually supposed to be better for your lawn because they don't flatten it down and they give a cleaner cut than gas mowers.  On the other hand if you let your lawn grow too long it will have difficulty cutting and your lawn will look spotty.  When ever I'm overdue for a mow, there's always two or three dandylion stems which the mower can't cut.  When the plants get too tall the reel just folds them down rather than cutting them.

I also hose down the blades and gears with WD-40 before and after every use to prevent rust and to stop it from schreeching as the wheels turn.

The push mower does a good enough job but I think very soon I may buy an electric mower.


Yellow, Let It Mellow (Level Orange)

As I've mentioned before we live in an town where your water bill is determined by how much water you use so I'm always looking for ways to cut down.

This reminded me of when I was younger and we lived in the country with a shallow well as our only supply of water.  With a shallow well conservation was very important because you can run out of water during dry spells which actually happened a few times!

One of the things we did back then was to only flush the toilet after the second time urinating.  It may sound gross but it was pretty common actually.  You may think that smell is an issue but it surprisingly wasn't and if it was that was usually a sign that it was time to flush because somebody didn't count right.

Flushing an average toilet actually uses between 6-11 litres of water!  That's a lot of water that can be saved by only flushing when necessary.

Unfortunately, my wife doesn't think this is a good idea . I can only "forget" so many times and "I don't want to wake the baby" only works when she's sleeping.  Therefore I need to find a compromise (she also doesn't accept using the hedges in the back yard).

Due to this we're looking into converting our toilets over to the dual flush type which have two buttons on them to flush: one for a small flush for "liquids" and the other big flush for "solids".

The dual flush supposedly only uses one litre for liquids which is great...but I keep reminding myself that "forgetting" to flush uses zero litres...

FYI: If it's brown, flush it down.


Clover Lawns (Level Green)


My back yard is mostly clay and it's heavily shaded which makes it hard to grow grass.  Not even "weed and feed" chemical sprays worked.

After 3 years of trying I decided to check out a book on organic lawn care and learned about clover.  It turns out that years ago a lawn full of clover was seen as desirable and not just full of weeds.  Clover also deposits nitrogen in the ground which helps other plants grow.  As an added bonus it requires less mowing than grass.

It occured to me that if I couldn't grow grass, maybe I could grow clover?

I asked a few of my relatives what they thought and the reaction was pretty much, "Why would you deliberatly plant weeds?".  Well, in my opinion, clover is better than clay mud and moss.

So after everybody said I was nut, I went to Canadian Tire and bought a bag of white clover.  I heard clover was easy to grow so I just spread it around by hand, especially in the really bare patches.

Well, within a few weeks, with hardly any effort at all, clover started to grow!  In fact, as I write this, the clover is the only thing growing in my yard this early in spring.

I've heard of people converting their whole property to clover but for now covering at least now my kids can play in the backyard without getting covered in clay.

The treehuggers got something right I guess.

Thursday, March 18, 2010

Setting Goals and Life Plans: Our Dream House

As I  mentioned in the last post, our plan is to begin building our dream home in 5 years or so.

Many people build their own homes though; what does this have to do with prepping and modern survivalism?

Building our own home actually involves prepping in two ways: planning for the home and living in the home.

1) Planning for the home

Part of modern survivalism is financial preparedness. By paying off debts and saving money we're moving to a position where we'll eventually be able to afford to build this home.

Secondly the things we're doing now are preparing us to live there.  For example, I'm reducing our electrical use because I want our dream home to eventually be off-grid.  Getting us used to energy conservation now will help us adapt to our new home.

Currently we use about 1200KW a month, but in our new energy efficient home I estimate that we will use between 5-700KW.  Amazingly, despite being a larger home with more gadgets, thanks to energy efficiencies our needs will be less.

My family and friends might think I'm nuts obsessing over things like CFL bulbs, my small vegetable garden and organic lawn care but they don't see the big picture.  Each one of those things are little preparedness steps to freedom!


2) Living in the home

Once we build and start living in this dream home I'm hoping to start living the prepper dream!

I don't think I've clearly stated it before but I'm hoping this new house can become a "homestead" that will provide for most of our needs: electricity, heat, food, water.

Electricity:

By being super-energy efficient my goal at first is to greatly reduce utility expenses.  Eventually I'll upgrade the system with so we'll be able to comfortably live during a winter power blackout and hopefully eventually reach the point where we can live off-grid.

For budget reasons I plan on starting with a minimum of 5 165W solar panels tied to the grid.  Over time I'll add more panels and a battery bank so we can have power during blackouts.  We'll also look into if a windmill generator is feasible.  Eventually I'd like to be able to live off-grid so we won't cut off the grid totally  because in case of emergencies it can be our backup.

Secondly, if we do things right we'll actually be able to make money by selling excess electricity to the grid!

We'll also save a lot of electricity by switching our stove, fridge and dryer to ultra-efficient propane models and cooking when I can with a solar oven.  If I can convince my wife, we'll cook with an old-style kitchen woodstove (but with modern technology) to be truly off-grid.


Heat:

For a number of reasons I want a minimum of 4 acres for our dream homestead.  One of these reason is because we want to install geothermal heat exchange to heat our home and water.  The pipes used in this system are often installed horizontally beneath the frost-line so we'll need room to do this.  The pipes can also be installed vertically but we don't want to limit ourselves to one option.

Geothermal is very energy efficient however it needs electricity to operate the heat pump so we'll include a wood stove as a back up source of heat for on the very cold nights or when the power goes out. Hopefully much of our wood will come from our own property.  Another great thing about geothermal is that it can also be used to efficiently cool your house in the summer by just reversing the pump!

Heating our water will be done using an instant-on tankless water heater.  Geothermal will also be used to pre-heat the water to further reduce the energy use.  I'll also look into solar water heating, especially for the planned indoor pool/sunroom.  It's possible that solar heating and geothermal could provide most of our hot water apart from the coldest winter months!

Lastly, we plan on building our home with Insulated Concrete Forms.  There are kinda like big styrofoam Lego-blocks that you build a home with.  After you make a wall with them they're filled with concrete.  This makes a very sturdy and energy efficient structure, (also water/air-tight, bulletproof, fireproof and hurricane/zombie resistant). With an R-Value of 45  ICFs will greatly reduce our energy needs.

Food:

I'm currently learning all I can about organic gardening and permaculture.  I don't knock those that use fertilizer and weed chemicals, however, to me that seems like a lot of work that you have to do every year.  I'd rather do it all naturally and although it might not look as pretty, at least it will be self-sustaining and low-maintenance.

My plan includes, a small orchard, a greenhouse, a number of raised bed squarefoot gardens, a goat to "mow" the grass and possibly milk and maybe chickens and bees.

With enough acres I could also start hunting or allow other to hunt there in exchange for some of their game.

These won't be enough for us to live completely off of but every little bit is less that I have to rely on the grocery store for and less sales taxes to the government.  It all equals more money in my pocket!


Water:

As I've mentioned before, living in a rural area will allow us to have our own well and avoid paying municipal utilities.  However, having and managing your own source of water also means that you must become a conservationist.

We plan on installing dual flush toilets and a grey-water recovery system in our homestead.  This will save the water from the sinks and bathtubs to use for things like flushing the toilets or watering the lawn.

We'll also install a rainwater harvesting system to save all the water that falls on our roof.

Not only will this prevent our well from drying out, but it will also save electricity by using the water pump less and it will extend the life of our sceptic system.

Our homestead plan will probably change and it may take longer than expected but one thing is for certain:

When the zombies come; we'll be ready
If I look in a mirror while dreaming this is what I see.

Friday, March 5, 2010

LED Bulbs at Home Depot

I don't know about you but I love just walking through Home Depot, looking at all the stuff and making mental inventories for our dream home.  I've always got an eye out for new energy efficient products and my latest trip did not disappoint.

On the shelves in the lightbulb section they had a display featuring Phillips brand LEDs.  I was immediately impressed because some of the LEDs were giving off a warm light which I've had difficulty finding.  In the past, despite claims of having "warm light" all the LEDs I've tried have been a harsh bluish colour. As you can see in the pic though, these don't.

They also come in both a bulb-style and a spot-lighting style for recessed light fixtures. 

Unfortunately I'm not sure if I'm ready to replace my CFLs just yet.

The bulbs are a little pricey at $30 each, though it's reasonable when you consider CFLs were over $80 when they first came out.  I bought my first CFL 10 years ago for $30 so hopefully the price of LEDs will drop as they have for CFLs.

Secondly, they use 7 watts and the spotlights are supposed to replace a 35 watt incandescent, while the bulbs replace only a 25 watt.  Currently the CFLs I have use 9 watts and are the equivalent to a 40 watt.  In terms of light output there probably isn't much of a noticeable difference, however, $30 a bulb probably isn't worth the 2 watts per bulb I'd save. 

That being said, if I wasn't already using CFLs I'd probably switch over to these LEDs and I'll probably buy one soon just to play around with it (I get excited over strange things).

For example, I'm slowly renovating my basement and I plan to use pot lamps in my ceiling.  These spotlight LEDs would be great for that.

Also if you're an off-grider these bulbs would definitely be worth a second look since every watt counts in that type of situation.

Pros

- only 7 watts
- warm colour
- no mercury
- no heat

Cons

- $30 a bulb
- not very bright, equal to 25 or 35 watt incandescent


FYI: Costco has a set of 3, 1.5 watt LEDs on sale for only $15 this month.  I've tried this brand before and didn't like the blue light they have but at that price I'd consider buying some for use outdoors.  They're "candle-style bulbs" but also come with 3 adaptors so they'll fit in regular sized sockets.

Friday, February 26, 2010

Food and Water in Retirement

Now that we've covered finances and shelter that leaves food and water.

Yesterday I touched on new technology to provide energy, but when it comes to food and water we have to look to what past generations did before 24 hour supermarkets and on-demand tap water.

Naturally this means gardening, but it also includes things like canning and pickling, water conservation and even basic cooking skills.

My wife's 82 year old grandmother still pickles all her own stuff and my friend's elderly grandfather has the most productive garden in town.

Unfortunately the knowledge and skills involved in these activities have been lost over the last few generations; however with the internet, knowledge that our grandparents never had access to is easily and cheaply available.

One thing that I think everybody should be doing is gardening.  Almost anybody can plant a few veggies from the huge row garden to the apartment balcony planter boxes.  Ideally your garden should provide the majority of your food,  however if it only provides 10%, that's still less money out of your pocket.

The "Squarefoot Garden" method is popular among preppers for it's low-maintenance and high productivity. There's plenty of info on-line covering Squarefoot Gardening and I plan on adapting it to my tiny yard this summer (which I'll post pics of here).


Our Canadian winter's though make storing and preserving food very important. Canning and pickling is the traditional method but dehydration is getting very popular.  Check out Dehydrate2Store for great info on dehydrating.

Apart from growing and preserving your own food every prepper should be stocking at least a month's worth of food but the exact amount is up to you.  You should practice the "eat what you store, store what you eat" method where begin stockpiling the foods you already eat. 

Having familiar food during emergencies makes it easier if you have to depend on your supplies. Secondly, it creates a natural rotation of supplies and avoids unused expired food.

Lastly, you can actually save money by storing food in this way.  Since we're Canadians let's use our national comfort food as an example: Kraft Diner.

I don't know about you but I'm shocked by how expensive KD has gotten lately and I refuse to buy it when it's over $1. Because of this I buy multiple boxes whenever it goes on sale.  This way if the price goes back up I can wait because I've still got a dozen or so boxes at home.

If you do this for all your regular groceries you can save up to 30%!

Now this leaves us with water which depending on where you live is either a very simple solution or a rather difficult one.If you live in the country you simply need a well, but if you're in the city this isn't an option.

However, if you can't look down for your water, you can always look up: rain.

Every downspout on your roof should have a rain barrel.  You can buy the expensive factory made ones, or you can make one out of a plastic barrel or garbage can

My town has a by-law saying when you can and can't water your lawn so I love "sticking it to the man" by using my rainwater to water my lawn during "forbidden days".  In areas where your water use is metered, you'll also save money by using less water.

No matter where you live though you should practice water conservation to either lower your water bill, to preserve your septic system and/or lower the electricity by the well pump.  You can do this in a number of ways that I'm sure we're all familiar with: low flow toilets and showerheads, short showers instead of baths etc..

Well, I think I've touched on a lot of basics in this series of posts. Please leave any ideas or comments.

I don't know about you but I can't wait for retirement!